
Introduction
I’m certainly not the first nor will I be the last person to use a mindmap to assist in writing a blog post, but it was only recently that I discovered how useful they are in writing regular news and other similar posts. In this post I’ll outline the approach I’ve developed for The Strategic Week posts on my StrategicMatters blog which relate to governance, planning, infrastructure and transport issues relating to Sydney Australia. While I’m no doubt telling some readers how to suck eggs, others may find this useful. I’m also very interested in any feedback, especially ideas on how this process can be improved.

StrategicMatters blog news post
First before I start, a bit of explanation of what I mean by “news posts”. These are blog posts with a lot of short articles each on current news items, usually related to a specific theme and/or area. These articles usually contain or are followed by hyperlinks to other material on the host website website or to other pages or downloadable documents on other websites. The techniques I’m describing can also be used with other blog post types, for example if you regularly publish lists such as “ten top tips on how to do x”, or “five best holiday locations in y city”.
News posts are a little different to the standard blog format which generally tackles one topic or issue at a time. In a sense they are a replacement for – or adaptation of – the more traditional newsletter with a mix of short news items that was originally distributed in hard copy and then electronically by email. You can of course still continue to notify your contacts by email or social media to advise them that a new post has been made and you can combine news posts with single issue ones on the same blog.
Second, I’ll describe the tools I’m using. These comprise MindManager for Windows v16, the WordX add-in for MindManager from Olympic Limited, MS Word and WordPress. I’m also using MS Excel to help with the Google search process (more on that in a later post) but this is optional. The approach I’m describing is specific to these tools but most of the basic principles can probably be applied to some degree with other mind mapping applications and combinations of programs. I should also note that copying from Word and pasting directly into WordPress is still slightly frowned upon because of the messy HTML code it can produce, but it works sufficiently for my purposes.
Finally, this is definitely not a general guide on how to write posts generally or specifically how to use WordPress. There are plenty of other people out there who know a lot more than me who have written extensively on these subjects. What I can say however is that the approach I’ve described seems on my reading to be broadly consistent with good blogging practice.
Step 1: Brainstorming – why am I doing this and what should it look like?
The first step is the most basic and also the most traditional uses of a mindmap – brainstorming the purpose of the blog, who the audience is and potential sources of information. For a news or listing type blog you might need a second brainstorming map as you have additional questions to answer, such as how frequently you are going to post and what format are you going to adopt – for example, are you going to structure the posts based on themes, issues, or geographical areas?
This second map will form the basis for the default heading structure for each of your regular posts, so as a general rule you should try to keep this simple and fairly flat. At this point you should decide on the WordPress theme you are going to use. Most should be suitable though some themes are better suited to news type posts. I’m using a fairly standard theme at the moment though I’m planning to investigate some more news-friendly themes.
Step 2: Framing the joint – creating the post structure
Now you need to create a topic structure that reflects the format you decided on in step one. The main topics should reflect the main sections and (if required) the first subtopics the next level of heading. Each topic level should have a distinctive topic colour or some other form of formatting. As I said, keep it as simple as possible – my weekly blog posts for example have only seven main topics/headings and no subtopics/subheadings.
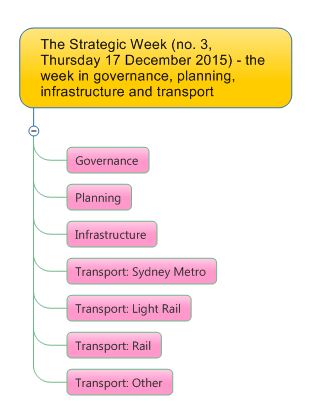
Simple news blog structure
The default subtopics (or sub-subtopics) can be used as general research topics, but you will need one form of subtopic with distinctive formatting – again a topic colour will do. These are the “article topics” which will be used for the individual news items within each post.
Once the structure is determined you can save the group of main topics as a map part (if you want to create and save more than one post per map) or as a template (if you want to create a separate map for each post). Of course you can still vary this structure for individual posts. The article topic should also be saved as a separate map part however as this will need to be added as required for each news item.
At this stage you should also decide whether you need tags or flags or not. While these can be useful in grouping items and keeping track of the themes or areas over time I haven’t found them as helpful as I would have thought, but I do use a flag to highlight completed articles. Another possible use for is to flag particularly interesting and priority items. Again, it’s best to keep the tag structure simple.
Step 3: Digging for data – doing your research
I don’t intend to tell people how to conduct their research, but it may be helpful to identify some of the available tools, especially those that are useful for regular news blog postings. Apart from Google and other search engines, these include Google Alerts, news stories, media releases from relevant organisations and RSS feeds from other blogs. Any item found through these processes can usually be sent directly to the relevant main topic in the map with a hyperlink to the web item.
You can also use the Google search map part in MindManager which pastes the search results directly into a map, but this is less useful than it might appear. The map part is based on the basic Google search not the Google Advanced format, so that the search and filtering options are very limited – for example, it’s difficult to specify a data range like “last week”. There are some work-arounds, however, which I’ll detail in my next post.

Simple news blog structure section with news article topics
Step 4: Reading…
After the initial phrase of research the material needs to read, assessed and further sorted and consolidated under the appropriate main topics and subtopics. As you read the material you can conduct further research and tag interesting and priority items. If you wish you can prepare initial summaries and paste relevant quotes in the topic notes for each research topic.
Step 5: … and writing
Now you can create the individual articles that will make up the news post. For each item add the article topic map part under the appropriate main topic, provide the item title and write the contents in the topic notes. You can copy any quotes as well as material you have already prepared in the research topic notes into the article topic notes; you can also add links to the original web pages either as links on the article topic or by adding them directly to text in the topic notes. As I said earlier I find it helpful to add a flag to indicate when an article is completed.
When the original writing phrase is completed the material will need to be proofread, not only to check or typos and spelling errors but also removing extraneous spaces and returns (for some reason, these seem to appear easily in MindManager topic notes). You may have noticed that you have ended up with a variety of fonts and type sizes as a result of copying quotes from different websites – if you have the MAP add-in it is easy to apply consistent formatting to all topic notes, but this isn’t strictly necessary if you are copying the material to Word.
This is a good place to talk about images. Unfortunately, while these can be added to topic notes and successfully exported to Word, they are ignored when the material is subsequently copied from Word to WordPress. Instead you have to use the WordPress image file upload process to insert them separately into the WordPress post.
Finally, don’t forget to save the blog post map, either as a stand-alone map (linked to a dashboard map) or part of a larger map with branches for each post. If the latter becomes too unwieldy over time you could set up maps for posts over a set period – say two or three months each – also linked to a dashboard map.
Step 6: Off to Word
There are three ways to transfer material from the article topics to your blog:
- Copy articles directly from the topic notes into the blog post. This is the simplest but most time-consuming, as each item has to be dealt with separately;
- Use MindManager’s Word export facility to export the whole post to Word and then copy to the blog. While I haven’t tried this for this particular purpose it should work, but it is not a particularly flexible process and is further complicated by MindManager adding its own version of the Word heading styles. It is also much more difficult to include or exclude specific topics; or
- Use the WordX add-in from Olympic Limited. This provides far greater control and flexibility, including the facility to easily include or exclude specific individual topics or topic groups and to assign a style to a topic irrespective of its topic level. It also uses the actual Word paragraph styles.
Here’s the approach I’ve developed using option 3. This description assumes that you have WordX installed and that you have some familiarity both with it and with Word heading styles:
- Go to the WordX ribbon and under Templates click on Manage and select an appropriate template. Unless you particularly need them in the post I would select a template without heading numbers, but these can also be removed easily once the map has been imported into Word.
- Before you apply the template untick the Initialise Map Topics with Default Styles, as this will apply a Word style to every topic in the map.
- Set up the post headings by filtering to select to select main topics only (based on the unique formatting you applied earlier). Then on the WordX ribbon go to the Style tab and apply the main heading style from the Word template that you wish to use to the highlighted main topics. Repeat this process for first level sub-topics if you are using these as sub-headings.
- Now you need to do the same with the article topics. Filter for these based on their unique formatting and select and apply the appropriate Word sub-heading style to the highlighted topics.
- While the article topics are still selected, check under the WordX Topic tab that Export Topic, Notes and Hyperlink(s) are highlighted for each item so that these will also be included in the export. Then confirm that all the relevant main topics, sub topics and article topics – and only these topics – show the WordX icon. Now you can export to Word.
Step 7: Tidying up
There is another reason to use Word as an intermediary stage in the conversion from a mindmap to a blog news post – it provides another opportunity to proofread the material. Word is also a great “leveller” in the sense that a uniform style is applied to the topic notes that will form the guts of the post.
The first task is to ensure that the map has been imported correctly with all the relevant main topics, subtopics, article topics and in particular the topic notes (the latter are easy to overlook). Also check that the hyperlinks have been imported correctly. After proofreading you can further fine-tune the text and formatting and save the file again ready for export.
Step 8: Pressing the post button
The final task is to transfer the Word document to WordPress. First, create a new WordPress post then copy the Word document and paste into the blank post; you also need to do this separately with the post title. At this point you can upload, caption and paste any images you want to include in the post. Then it’s time for a final proofread.
The final steps are to add WordPress categories and tags, check and if necessary update the WordPress Publicize connections and review in WordPress Preview. Now you can press the Publish button to upload the post. After checking that it has been posted successfully all that is needed to do is to share the post’s URL and publicise it as appropriate.

Writing news blogs in WordPress with MindManager – summary map

Pingback: What happened in Sociamind in 2015? | Sociamind
Pingback: Freestyle – how to deal with MindManager styles in documents exported to Word | Sociamind